Powered by Jasper Roberts Consulting - Widget
Top photoshop tips & tutorials: August 2014
Powered by Blogger.
RSS

Extracting Transparent Elements


Planet Photoshop


Extracting Transparent Elements


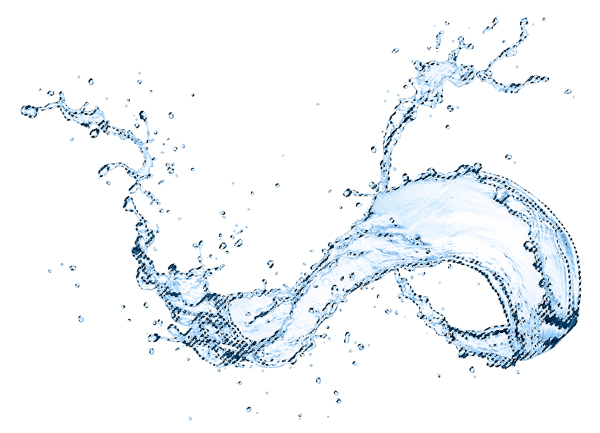
The Quick Selection tool and the Refine Edge dialog are the go-to resources for making precise selections, yet when it comes to extracting transparent elements on a solid-colored background, nothing is faster than working with channels. In today’s tutorial, we’ll make quick work of extracting a busy, transparent water splash element from a white background using channels.


[Planetphotoshop.com visitors may download the iStockphoto file used in this tutorial by clicking here. All files are for personal use only.]


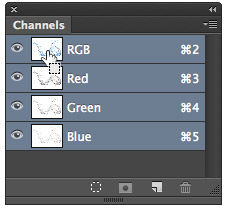
Step One: Pull a Selection from the RGB Channel

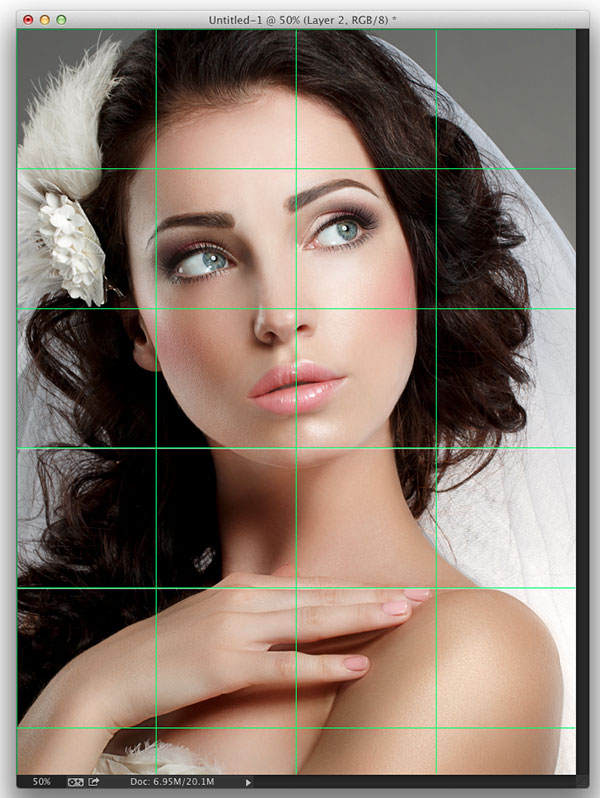
Open the download file or an image of a transparent subject on a white background. In the Channels panel (Window>Channels), Command-click (PC: Ctrl-click) on the RGB channel thumbnail to pull a selection from the bright areas. Choose Select>Inverse to invert the selection so it surrounds the water splash element.


Extracting Transparent Elements

iStockphoto, ansonsaw, Image #13225547


Extracting Transparent Elements


Extracting Transparent Elements


Step Two: Build Density and Test the Quality of the Selection

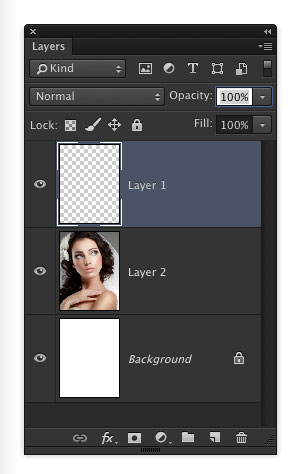
In the Layers panel, press Command-J (PC: Ctrl-J) to copy the selected water element to its own layer.


Extracting Transparent Elements


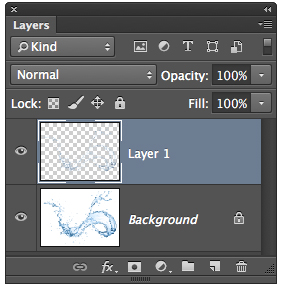
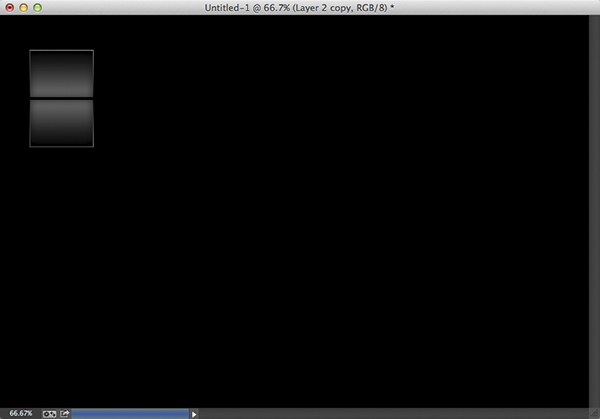
Now let’s inspect the element over both white and black to determine if it needs improvement. Choose Layer>New Fill Layer>Solid Color. Click OK. Ensure that the layer is filled with white by clicking the B radio button and setting the value to 100% (make sure the H and S values are set to 0). Click OK to close the Color Picker.


Extracting Transparent Elements


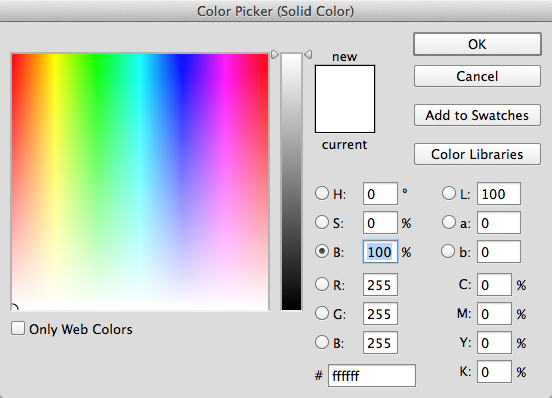
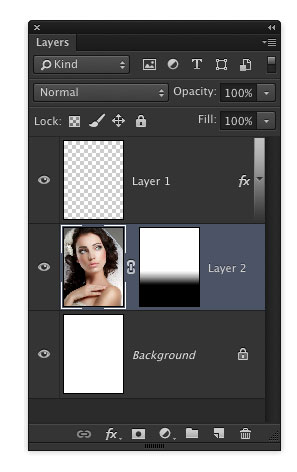
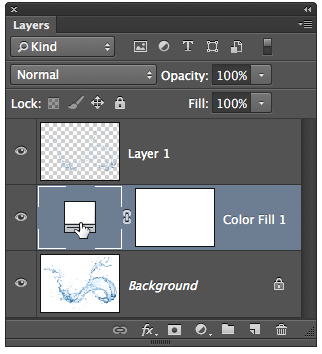
In the Layers panel, drag the Color Fill layer below the extracted water element layer (Layer 1). The extracted water element looks a bit too transparent, but before we modify it, let’s confirm this. Double-click the layer thumbnail for the Color Fill layer. With the B radio button still active in the Color Picker, set the value to 0% (black), and click OK.


Extracting Transparent Elements


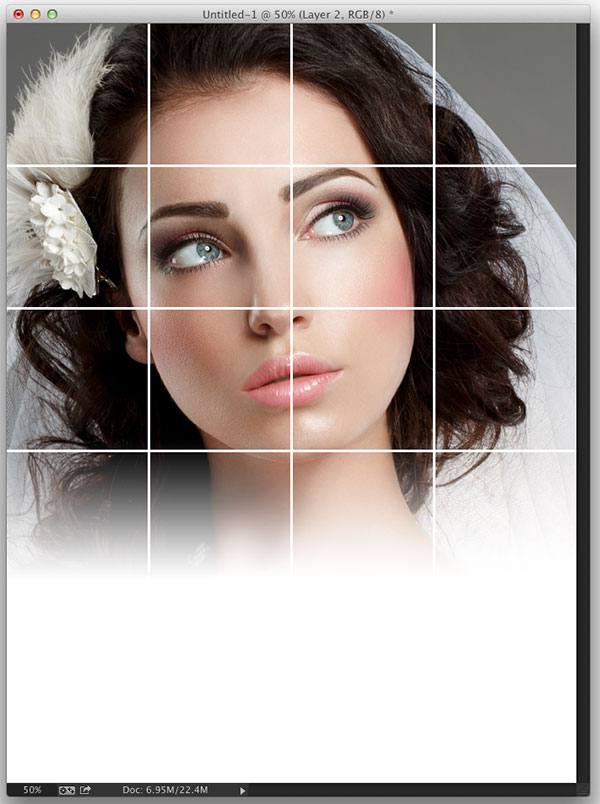
Now it’s crystal clear that the extracted water element lacks density. To build density, activate the extracted water splash layer and press Command-J (PC: Ctrl-J) numerous times until the element looks as it did before the extraction.


Extracting Transparent Elements


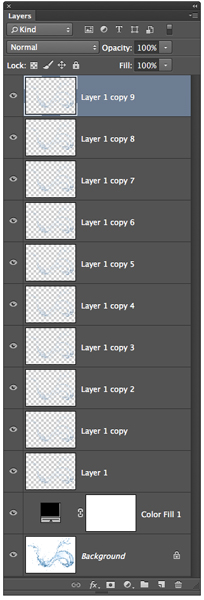
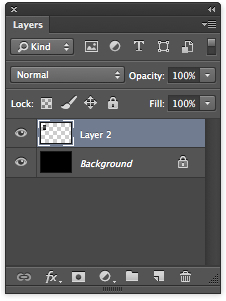
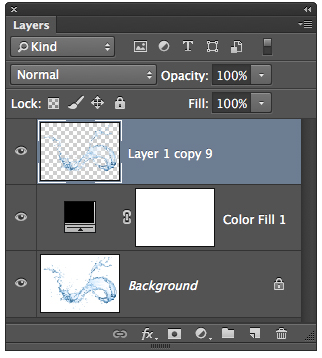
To tidy up the layers and make them more manageable, activate the top layer, then Shift-click on the bottommost extracted element layer (Layer 1). Choose Layer>Merge Layers.


Extracting Transparent Elements


Step Three: Clean Up the Fringed Edges

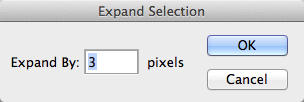
There are multiple ways to eliminate the white fringing that’s visible around the edges. We’ll explore the two most valuable methods. Choose Layer>Matting>Defringe. Enter a Width value of 1–3 pixels and click OK.


Extracting Transparent Elements


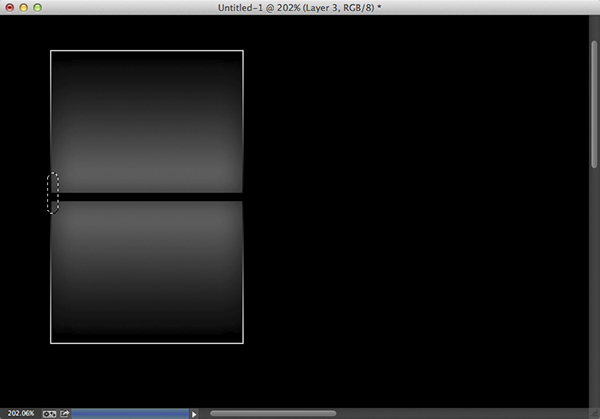
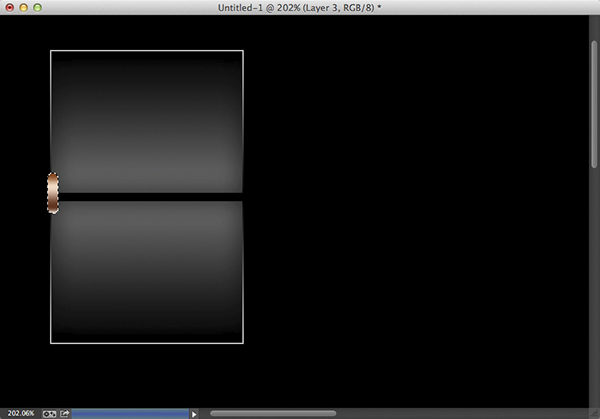
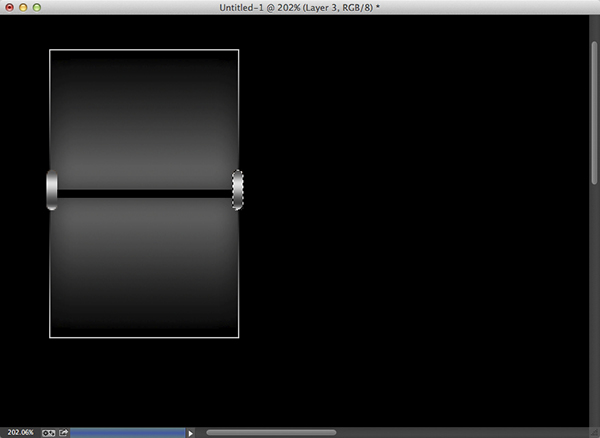
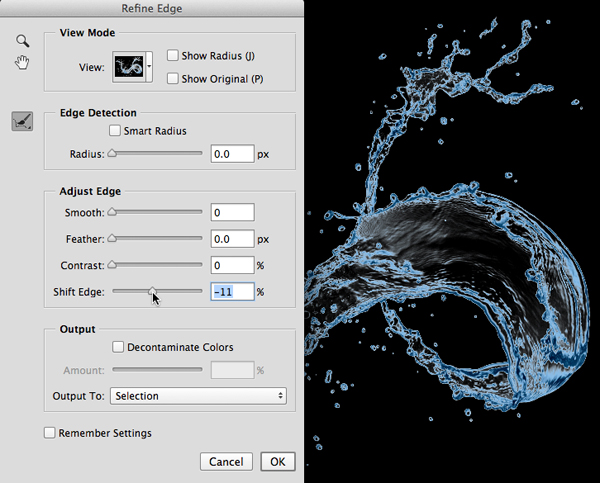
If the edges look believable, you’re off and running. If, however, you’d like to explore an alternative approach, keep reading. Start by pressing Command-Z (PC: Ctrl-Z) to undo the defringing. Now, Command-click (PC: Ctrl-click) the extracted water splash element layer thumbnail to pull a selection.


Extracting Transparent Elements


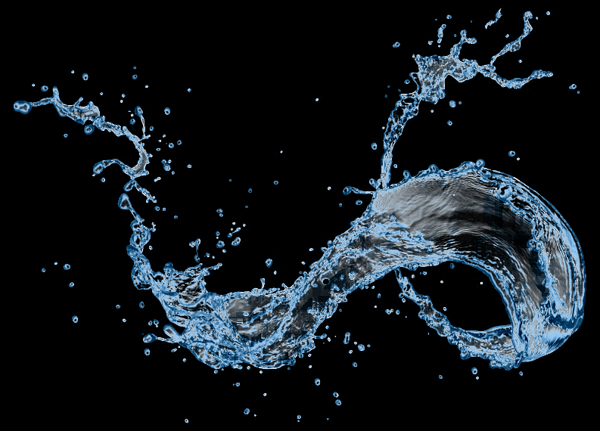
With the extracted water splash layer active, choose Select>Refine Edge. View the scene On Black (B). Drag the Shift Edge slider to the left to interactively eliminate the fringing. Set the Output To menu to Layer Mask and click OK. Voilà! You have a great looking extracted water element ready for use on a dark background.


Extracting Transparent Elements

Extracting Transparent Elements


Mark S. Johnson Photography

msjphotography.com


  • Digg
  • Del.icio.us
  • StumbleUpon
  • Reddit
  • RSS

Flip Fonts Effect


Planet Photoshop


Flip Fonts Effect


I saw this technique used as a headline type treatment for an advertisement in a recent issue of SkyMall magazine. What’s nice about this technique is its simplicity and flexibility. You can have as many or as few tiles as needed, and you can change the font color or messaging very easily. It’s one of those simple but effective techniques that works perfectly as an additional design element.


STEP ONE: Press D then X to make the Background color black, then choose File>New to create a new 6×4″, 212-ppi document with the Background Contents set to Background Color. Click on the Foreground color swatch at the bottom of the Toolbox, choose gray as the color (R:100, G:100, B:100), and click OK. Click on the Create a New Layer icon at the bottom of the Layers panel to add a new layer (Layer 1). Choose the Rectangular Marquee tool (M) from the Toolbox. Make a rectangular selection in the upper-left portion of the document.


Flip Fonts Effect


Flip Fonts Effect


STEP TWO: Choose the Gradient tool (G) from the Toolbox. Click on the Gradient thumbnail in the Options Bar to open the Gradient Editor, choose Foreground to Background, and click OK. Hold the Shift key and click-and-drag a linear gradient from the bottom toward the top of the selection. Press Command-D (PC: Ctrl-D) to deselect.


Flip Fonts Effect


STEP THREE: Click the Add a Layer Style icon (ƒx) at the bottom of the Layers panel, and choose Stroke. Enter 1 px for Size, choose Inside for Position, and lower the Opacity to 75%. Choose Gradient as the Fill Type, enter 90º for Angle, and 100% for Scale. Now, choose Inner Shadow from the Styles list on the left side of the Layer Style dialog. Uncheck Use Global Light, enter –90º for Angle, 0 px for Distance, and 20 px for Size. Click OK to apply the layer styles.


Flip Fonts Effect

Flip Fonts Effect


STEP FOUR: Create a new layer (Layer 2) and move it below Layer 1 in the Layers panel. Click on Layer 1 to make it the active layer, then press Command-E (PC: Ctrl-E) to Merge Down (it will merge with Layer 2).


Flip Fonts Effect

Flip Fonts Effect


STEP FIVE: Command-click (PC: Ctrl-click) on the Layer 2 thumbnail to load it as a selection. Press Command-Option-T (PC: Ctrl-Alt-T) to duplicate the square in Layer 2 and bring up the Free Transform bounding box. Now, Right-click in the center of the bounding box and choose Flip Vertical. Using the Down Arrow key, move the duplicated square below the original square. Press Enter to apply the transformation.


Flip Fonts Effect


STEP SIX: Create another new layer (Layer 3). Choose the Rounded Rectangle tool (nested under the Rectangle tool [U]). In the Options Bar, set the drop-down menu on the left to Path, and enter 10 px for Radius. Create a small, vertical, rounded rectangle on the left side of the two squares (see example). Go to the Paths panel (Window>Paths) and Command-click (PC: Ctrl-click) on the Work Path thumbnail you just created to load it as a selection.


Flip Fonts Effect

Flip Fonts Effect


STEP SEVEN: Choose the Gradient tool, click the Gradient thumbnail in the Options Bar, choose Copper as the gradient (it’s one of the default gradients), and click OK. Click-and-drag a gradient from the top toward the bottom of the selection. Press Com­mand-Shift-U (PC: Ctrl-Shift-U) to desaturate the color. Now, while holding down the Command-Option-Shift (PC: Ctrl-Alt-Shift) keys, click-and-drag a duplicate shape to the right side of the squares (see example).


Flip Fonts Effect

Flip Fonts Effect

Flip Fonts Effect


STEP EIGHT: Command-click (PC: Ctrl-click) on Layer 3 to load it as a selection. Go to Select>Modify>Expand. Enter 3 pixels and click OK. Click on Layer 2, press Delete (PC: Backspace). Click back on Layer 3 and press Command-E (PC: Ctrl-E) to Merge Down.


Flip Fonts Effect

Flip Fonts Effect

Flip Fonts Effect


STEP NINE: Now that all the elements are on one layer, Command-click (PC: Ctrl-click) the Layer 2 thumbnail to load it as a selection. Choose the Move tool, press-and-hold Command-Option-Shift (PC: Ctrl-Alt-Shift), and click-and-drag to duplicate it (on the same layer) as many times as needed, depending on the number of characters you’ll need for your messaging. Our example calls for three rows with seven characters in each row.


Flip Fonts Effect


STEP TEN: Choose the Type tool (T) from the Toolbox, and set the Foreground color to a lighter gray. Choose your typeface (we’re using Helvetica Bold Condensed) and enter your first line of text (each line of type will have to be created independently on separate layers). Make your text the appropriate size, and then position the first letter over the first set of squares. Place the cursor between the first two letters, hold the Option (PC: Alt) key, and press the Right Arrow key on your keyboard to kern the second letter until it’s centered over the second set of squares. You’ll have to kern each character individually so they line up over the center of each set of squares.


Flip Fonts Effect


STEP ELEVEN: Click on the Add a Layer Style icon at the bottom of the Layers panel and choose Gradient Overlay. Choose Overlay as the Blend Mode and click OK. Command-click (PC: Ctrl-click) on the Layer 2 thumbnail to load it as a selection. Click on the Add Layer Mask icon (circle in a square) at the bottom of the Layers panel.


Flip Fonts Effect

Flip Fonts Effect


STEP TWELVE: Repeat Steps Ten and Eleven for any additional lines of type to complete the effect.


Flip Fonts Effect


This article is courtesy of Photoshop User magazine, the official publication of KelbyOne, which provides quality online education for creative people. For more information, visit KelbyOne.com.


  • Digg
  • Del.icio.us
  • StumbleUpon
  • Reddit
  • RSS

Create a Wave Brush with Photoshop’s Mixer Brush


Planet Photoshop


Create a Wave Brush with Photoshop’s Mixer Brush


Stephen Burns discusses the new mixer brush in Photoshop and how it can be used to create a brush from an image with full color properties and luminance values.


  • Digg
  • Del.icio.us
  • StumbleUpon
  • Reddit
  • RSS

Wedding Grid


Planet Photoshop


Wedding Grid


This is a cool grid effect I did back in my first book, Photoshop Down & Dirty Tricks for Designers, and I thought it lent itself nicely to a wedding-themed design. With a few updated tricks for this technique, you can definitely have some fun with your wedding images.


STEP ONE: Create a new document (File>New) that’s 9×12″ at 100 ppi. Make sure the Background Contents drop-down menu in the New dialog is set to White.


STEP TWO: Go to Photoshop (PC: Edit)>Preferences>Guides, Grid & Slices. We want to create four squares across our document, so enter 2.25 Inches where it says Gridline Every. Then, set the Subdivisions to 1. The default color will work fine but we would prefer something more visible. Click on the color swatch and choose a different color. We chose a light green. Click OK when done. You won’t see the grid in your document just yet.


Wedding Grid


STEP THREE: Go to View>Show>Grid. You should now see a grid with several rows going across the image, each with four equal squares. 


STEP FOUR: In the Toolbox, click-and-hold on the Rectangular Marquee tool (M) and choose the Single Row Marquee tool from the toolset. Click on the first horizontal grid line at the top of the document and it will add a selection 1-pixel high and the width of the document. The selection will snap to the grid line. Then, hold down the Shift key and add selections to the remaining horizontal guide lines. Remember to hold down the Shift key to add each selection to the existing horizontal selections.


Wedding Grid


STEP FIVE: Go to the Toolbox again and grab the Single Column Marquee tool. Use the same process to add selections to the vertical grid lines (don’t forget the Shift key). Once the selections are made, click the Create a New Layer icon at the bottom of the Layers panel. Press D to set the default colors, and then press Command-Delete (PC: Ctrl-Backspace) to fill the selections with white. Press Command-D (PC: Ctrl-D) to deselect.


Wedding Grid

Wedding Grid


STEP SIX: Open the model shot you’re going to use in the design. We’re using a photo of a bride courtesy of Fotolia. I liked this image because of the lighting and the positioning of the model in the composition. Use the Move tool (V) to click-and-drag this image into the grid layout file. Press Command-T (PC: Ctrl-T) for Free Transform, hold the Shift key, and drag corner points to scale the model in the composition. Click-and-drag inside the bounding box to position the image. Press Enter to commit the transformation. Also, in the Layers panel, make sure this image layer is placed below the layer containing the grid lines.


Wedding Grid

CREDIT: FOTOLIA, GROMOVATAYA, IMAGE #60388839


Wedding Grid


STEP SEVEN: With the model layer active, click the Add Layer Mask icon (circle in a square) at the bottom of the Layers panel. Select the Gradient tool (G) from the Toolbox. Click on the gradient preview in the Options Bar, choose the Foreground to Transparent gradient preset, and click OK. Press X until the Foreground color is set to black. Click-and-drag the gradient starting at the second grid line from the bottom of the photo up to the next grid line to fade the image to the white background.


Wedding Grid


STEP EIGHT: Now to make the grid lines a little thicker we’ll use a simple layer style. First, turn off the grid by going back to View>Show>Grid, and click on the grid lines layer in the Layers panel to make it active. Next, click on the Add a Layer Style icon (fx) at the bottom of the Layers panel and choose Stroke. Click on the Color swatch to open the Color Picker, set the color to white, and click OK. Then, set the Size to 3 px and make sure the Position drop-down menu is set to Outside. Click OK.


Wedding Grid

Wedding Grid


STEP NINE: Now reselect the model layer and make a duplicate of the layer by pressing Command-J (PC: Ctrl-J). Press Shift-Command-U (PC: Shift-Ctrl-U) to remove the color from this duplicate layer. Go to Filter>Distort>Diffuse Glow. (Note: If you don’t see the Diffuse Glow option under Distort, choose Filter>Filter Gallery instead, then click on the Distort folder near the right side of the dialog to reveal the Diffuse Glow filter.) Set the Graininess to 3, the Glow Amount to 5, and the Clear Amount to 15. This will blow out the highlights a bit and give us a stylish grain over the whole image. Click OK. (This setting will vary with different images; be sure to experiment with other settings to get the look you want.)


Wedding Grid


STEP TEN: In the Layers panel, change the layer blend mode to Soft Light and drop the layer Opacity to 75%. This will add some stylish contrast to the image.


Wedding Grid


STEP ELEVEN: Now let’s add a subtle color effect using a Gradient Map. Click on the Create New Adjustment Layer icon (half-white, half-black circle) at the bottom of the Layers panel and choose Gradient Map. In the Properties panel, click on the gradient preview to open the Gradient Editor. Click on the dialog’s flyout menu (gear icon) in the upper right and choose the Photographic Toning presets. Choose to Append to the existing set when asked. Choose the Gold-Selenium 2 gradient, and click OK. In the Layers panel, set the adjustment layer blend mode to Soft Light and the Opacity to 25%.


Wedding Grid

Wedding Grid

Wedding Grid


STEP TWELVE: Make the layer containing the grid lines active. Select the Magic Wand tool (nested under the Quick Selection tool [W] in the Toolbox) and click inside the top left square. Hold down the Shift key and add two other squares like you see here, or however many you would like. Once the selections are in place, create a new blank layer and fill the square selections with white. Deselect.


Wedding Grid


STEP THIRTEEN: Now make the grid lines layer active, and use the Magic Wand tool once again to select three more squares. Click on the Create New Adjustment Layer icon again and choose Black & White. This will make the selected areas of the image black and white, giving us a very cool finished effect. Feel free to play around with other adjustments or colors to get different results.


Wedding Grid


STEP FOURTEEN: Finally, just drop in some text and you have a finished design. You can see we also used the white squares to act as frames for the text.


Wedding Grid


This article is courtesy of Photoshop User magazine, the official publication of KelbyOne, which provides quality online education for creative people. For more information, visit KelbyOne.com.


  • Digg
  • Del.icio.us
  • StumbleUpon
  • Reddit
  • RSS